
I love sushi. Granted, making it at home can be a bit of a process, but once you become a DIY sushi pro it’s so satisfying when your meal is sitting in front of you! And practice makes perfect so take some encouragement in the fact that you’ll be a little quicker each time you do it.

This recipe makes two rolls of sushi, or 16 pieces.
INGREDIENTS
- 200g chicken tenderloins
- 2 sheets of nori (seaweed) sheets
- 1 cup sushi rice
- 2 tblspns rice wine vinegar
- 1/4 tspn salt
- 1 tblspn caster sugar
- 1/4 cucumber, thinly sliced and halved lengthwise
- 1/4 capsicum, thinly sliced
- 1/2 avocado, thinly sliced (I didn’t use it in the pics as at the time I made this recipe they were $4.99 each at my local supermarket!)
- Sesame seeds (optional)
- Mayonnaise
- Soy sauce to serve (I use Yamasa, a brand you’ll find in most Japanese sushi restaurants)
- Pickled ginger (optional)
- Wasabi (optional)
TERIYAKI SAUCE
- 1/4 cup soy sauce
- 1 tspn garlic, crushed
- 1/2 tspn chilli, sliced and deseeded
- 1/2 tspn cornflour
- 2 tblspns brown sugar
- 1/2 tspn ginger, grated
- 1/2 tblspn sesame oil
METHOD
Combine teriyaki sauce ingredients and the chicken tenderloins in a bowl, then mix well to combine ensuring chicken is well coated in the sauce. Cover bowl with plastic cling wrap and leave in fridge to marinate for at least 15 minutes (several hours would be better).
Cook sushi rice as per packet instructions. Fluff up, cover and allow to cool. Mix in rice wine vinegar, caster sugar and salt until it is stirred through well.
Pan fry teriyaki chicken on a medium heat until cooked through. There will be quite a lot of sauce (likely to be some left over) so keep turning the chicken as it cooks to coat it well. Once cooked, remove from heat and allow to cool. Slice into strips around 1cm thick.
ASSEMBLING YOUR SUSHI
Run the bamboo mat under water so that the whole mat is damp, then lay on a flat surface, oriented so that you can roll it up/away from you. Lay a sheet of nori across your mat, long edge widthways. By the time you are ready to roll your sushi, the nori should be damp through (if it’s too dry, you won’t be able to close your roll and seal it properly; plus it will taste chewy!).
Spread cooled rice over the sheet of nori around 1cm thick, taking it right to the edges and pressing down slightly, leaving a 2-3 centimeter strip along the top of it bare (this will provide the end to ‘seal’ it closed when you roll it).
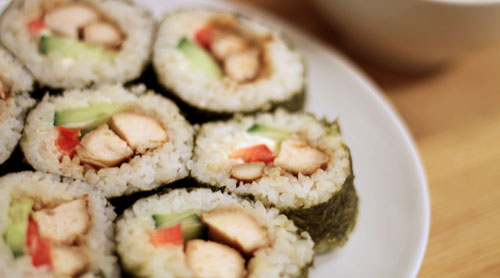
When you make sushi for the first time, be moderate with your toppings as it may be difficult to roll if you overfill it. Spread a thin amount of mayonnaise widthways in a strip along the center of your rice. Top with a line of sliced chicken, capsicum, cucumber and avocado. Try to spread these evenly; when you cut your roll into slices, you want there to be some of each ingredient in each slice, preferably visible on both sides of the piece. Sprinkle with sesame seeds.

Rolling your sushi tightly enough is the trickiest part and can take some practice. We’ve had a lot of deconstructed sushi meals in our household in the time it’s taken to master it!

Getting your roll tight is important, otherwise once you’ve cut it into pieces the ingredients will likely fall out when you attempt to transfer to a serving dish or when you pick them up to eat them. I found that when you’re starting out it can help to hold the center down with a knife (hold it from the edge and lay the blade flat down across the toppings) so you can bring it up tightly enough.
Bring the top end down tightly over the top of your roll, then use the damp blank edge of nori to seal it.

Using a sharp knife, slice into pieces around 2cm thick, creating 8 pieces. The end pieces may look a little ‘rustic’ and that’s normal… If you don’t have a knife that’s sharp enough, you may be able to use a serrated knife to gently cut it into pieces. Take your time and don’t rush this step otherwise your sushi will come out looking squashed and may lose its insides!
Serve with soy sauce, pickled ginger and wasabi.
Images / NZ Real Health